Sewing Cafe

Patterns, Tutorials and Works in Progress from the Sewing Studio of Lynne Williams
Showing posts with label vintage. Show all posts

Wednesday, May 21, 2014

Claire Schaeffer- Chanel and That Suit class review


I have recently returned from a fabulous sewing adventure in Palm Springs Calif.  After many years of hopeful desire I have finally realized my dream of taking a class with Claire Shaeffer.

If you don't know about Claire I suggest you head over to Amazon where she has many books for sale, or Threads where she has countless articles that she has contributed.  She is a leading educator in the art and craft of fashion sewing and a major collector of vintage couture fashion.

Your week begins having dinner at Claire's home, being introduced to her husband, well behaved dogs and  fellow students. It ends with regretful partings, half of a Chanel jacket and as many supplies as you can pack into a large flat rate shipping box.

The highlights for me outside of the 100+ degree weather and the familiar landscape were....

#1 

Seeing Chanel Couture garments up close and personal


Claire is incredibly generous with her time, energy and knowledge.  Every day new jackets would arrive at class for us to pour over, take pictures of, discuss and discover.


She took delight in pointing out to us the unusual details and amazing techniques used to create these beautiful garments.
Under collar detail of a Chanel couture jacket 

Pocket detail of a Chanel jacket


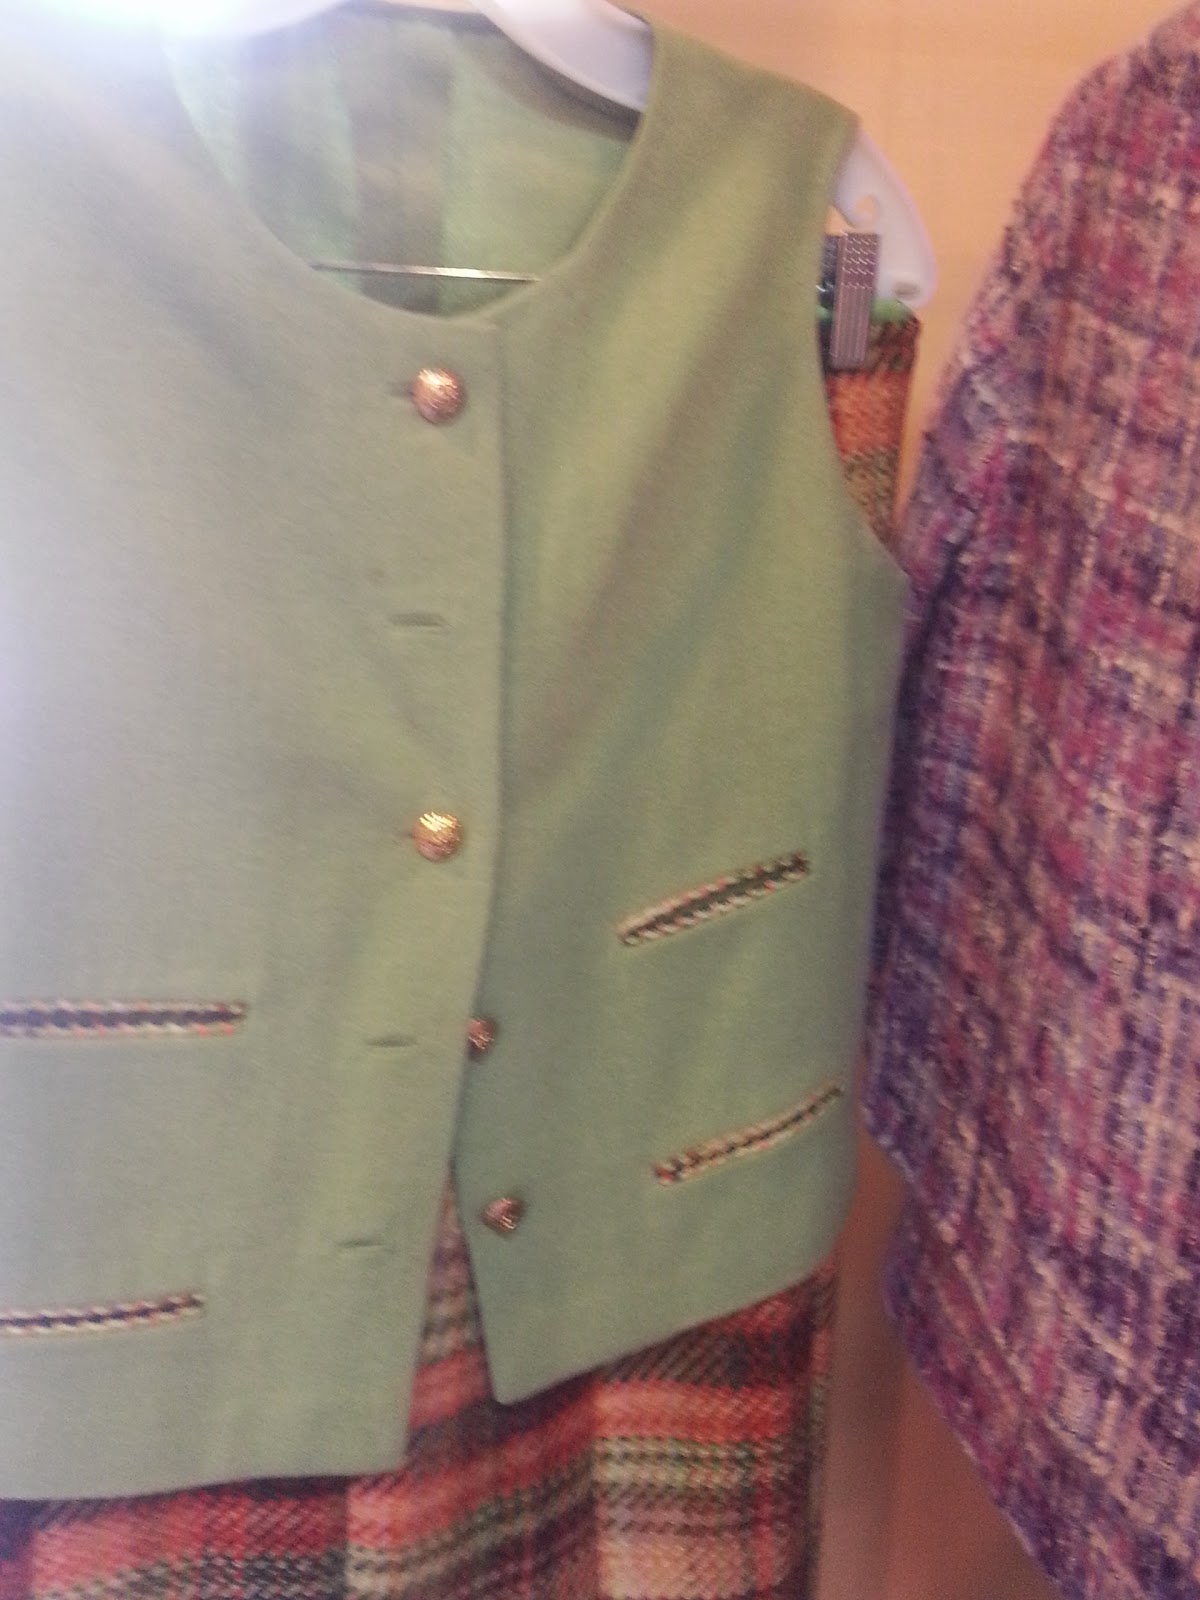
 We not only got to see the jackets, but vests, skirts and blouses that accompanied them.


#2 - Instruction

Claire would demonstrate the techniques we would need for each days sewing.  Thread basting, seaming, making trims, buttonholes, setting sleeves, shaping collars, etc.  It was a lot of information, a lot of sewing and a lot of fun!!  Although I own many of her books, have watched her DVD's  and sew almost every day of my life, there is nothing like watching someone stitch with accuracy and efficiency to help you improve your skills and learn new ones.

#3 - More Instruction

After learning a new technique and creating a sample being able to compare my work to the work done in the Chanel workroom...valuable beyond all measure!!
  One day I asked Claire about a certain hard to obtain pattern book..on the following day, not only had she brought in that book but every other book she had on the subject so that I could determine for myself which would be the most valuable for me to own.  It was a generous thing to do and extremely helpful for me.  She did this in various ways for each and every one of us!

#4 - The Other Participants

Claire has an assistant.  The dear Linda Homan, who we could confess our mistakes to, ask assistance from and who generally took care of us and Claire making all things run smoothly.
My fellow students were, bloggers, teachers, " beginners" and re-beginners. They were kind, supportive, encouraging and tired. It is a bit of a marathon, between getting to know people, looking at each new garment that was brought in, learning new techniques and trying to keep up with the days agenda, but so worth it. 

In summary, I had a great time, I cannot wait to take another class from her and I would encourage any of you who want to expand your sewing skills, regardless of your interest in Chanel or your level of experience to do so without hesitation. 
 Make it happen, you will not regret it.

If you would like to see more and learn more about Claire's class head over to La Sewista for a fab review

Saturday, July 28, 2012

Thrift Store Find - Vintage Rayon Dress

Chuck and I were in Minocqua recently and upon completing our necessary business we decided to treat ourselves to breakfast and some antique shopping.  Breakfast was at Paul Bunyan's and before you groan in disbelief ( those of you who know it) let me just say horrible camp food eaten in the "family style" reminds us both of our childhood...and summer....it all goes hand in hand. 
 So let's just talk shopping for vintage fashion at Island City Antiques
You will not believe what Chuck found there! 
 He is such a hunter!!
They have such a small clothes rack there and I never, never, never find anything of interest, but Chuck, hit the jackpot..... for little ol' me.  
The rack was full of vintage garments in my size.  Someone's closet obviously was cleared out and did I benefit.

First up is this rayon dress.


 My apologies for the quality of this first shot.  I tried and tried to get a nice shot, but I don't think my poor little camera knew what to focus on. 
The daisy's, the ballerina's, the gift boxes, or maybe the rhinestone buttons?

What a curious mix up of a fabric.

The ruching covers the front yoke and is stabilized with a plain lining.  
The same is used for the facing on the front placket.  The small collar is under stitched.
Can you even believe that the self belt is still with it?


There is a small hook at the collar with a thread loop on the corresponding side.  
In some ways this dress is simplicity itself.  The facing and unfinished seams are basic to say the least, but then you have beautifully made spaghetti loops with the lovely little tie at the throat.
It makes me curious...and I was beginning to think it was hand/custom made for the client when.....


I found this one tag along the back skirt princess seam, printed with  style # 1240


The hem , which I pinned up so you could all take a gander at it is done with  rayon seam tape and a machine blind hem.
The belt overlaps in the back and has a series of buttons underneath with 2 buttonholes on the top so that you can adjust the fit.
Underneath the belt there is a small casing with some elastic in it, which is still in good working order!

I am hoping someone can provide some more information about this dress.
Have you seen ready made garments without seam finishes before?
What year would you place this dress from?

There will be more vintage garments  to follow...eventually..I promise - lol

Friday, May 4, 2012

Vintage Fashion - A Spectator by Guildford

I feel I must begin this post by apologizing a tad for my lack of enthusiasm for blogging...following blogs...posting....commenting ....etc.  
I have been working on some fun projects though and when my enthusiasm returned I could not find my camera!!  Seriously.....it's not like me to panic about these things....no matter how organized I am, I misplace things on a fairly regular basis.... usually they reappear eventually.  
My camera made it's appearance last night when my mother handed it back to me -lol

So first thing this morning I captured these pics of  a vintage dress of my mothers.


She purchased this dress in the early 50's when she was a girl of 15 to wear to a school dance.
She used multiple crinolines under it and wore it with a black patent leather belt and black pumps.
The belts chains on the dress are in black and would accommodate a 1 inch belt. I used a piece of velvet ribbon I had about.

The skirt is made in 8 gores and the hem circumference  measures 260 inches!
In these pictures I have 2 crinolines under the skirt and it could easily be double that.
Makes you want to dance doesn't it?


The cotton on this dress had a glazed finish on it, which has worn away due to multiple washing's.
My bad....I wore this dress frequently in the 80's and machine washed it roughly as young people will.
It zips up the side with a metal zipper and has one pocket in the skirt opposite the zip.


Love the details on this dress - These little appliqued roses are all tacked into place with a single rhinestone.
Additional rhinestones are scattered over the bodice.


The neckline and armholes are piped and faced.
I just love the elegant square neckline on the back


The hem is done with rayon seam tape and all of the seams are pinked...so simple


The inside label reads " A Spectator by Guildford" and is the only tag in the garment.
Does anyone have any information on this company?
There is a town by the name of Guildford in the UK...but I did not round up any info for this company.
So for those of you who like a good mystery....

I promise to catch you up on the 1912 project, my gardening overalls, my bra making adventures, the craftsy block of the month project, and Chucks latest endeavor an original scultpture of Adam West

Tuesday, April 17, 2012

The 1912 Project - Oh my!!

The 1912 project has taken a radical turn which has me in a conundrum....sigh

When the good folks at the Vintage Lending Library began their project of digitizing and printing patterns from La Mode Illustre, I seriously doubt they expected to have 400 people want to participate.  This left them with the herculean task of not only digitizing the patterns, translating what directions there were from French into English but also distributing those patterns to all of the eager test sewers. 

 Imagine trying to organize 400 eager stitchers! 
 I truly applaud their efforts.

The logistics of this trial has produced important organizational changes the gist of which leaves me deciding which patterns I would like to sew up for them......Honestly I was quite happy with this decision being out of my hands...one less decision for me to make and I like the era, so it's all good....right?

So I am asking for your help dear readers.  After looking through all of the available designs (currently available that is) I chose the ones below as my favorites or possibly useful garments. 
 I can ask for as many as six!  But which do I choose?
What do you think?  Help me choose a design to sew up and blog about.  What catches your fancy?


LADIES DRESS IN JAPAN BLUE TAFFETA WITH SATIN TRIM
#1
This dress has an appealing hem detail and looks relatively straight forward construction wise.  
Could it be useful if the length was modified or do I make it for display/sale?  

LADIES SKIRT WITH SIDE GORES
 #2
This skirt could be charming in a mid calf length( so possibly useful) and it too appears straight forward in construction.
SUIT FOR YOUNG WOMAN IN MARINE BLUE WITH WHITE STRIPE
#3
 This suit is quite intriguing....The suggested fabric is a pin stripe and the pockets are pieced so that the stripe miters.  The collar detail is lovely and it too has an interesting hem detail this time at the back of the skirt.  This would be for display or for sale.


LADIES JACKET IN HEAVY WOOL WITH VELVET ACCENT
 #4
I am in need of a coat and this could be done as suggested in a wool with velvet accents.


LADIES BLOUSE WITH OUT LINING IN CHECK FABRIC WITH STIFF LINEN COLLAR
 #5
This is the perfect school mistress blouse right?  I could update it for sure and I do need blouses:)
Another plus...it's not a large time or financial commitment

LADIES DUSTER COAT
 #6
Another coat possibility...Trim, buttons and large patch pockets in a modified 3/4 length...Rather nice, but what fabric? What color?
Love the hat...not included of course - lol

LADIES BLOUSE WITH CUT WORK AND PLEATS
#7
Another useful blouse....oh so sweet, and yes I would consider hand finishing those scallops and embroidering those charming dots or are they eyelot holes?  Not a fan of the peter pan collar on me but again I could modify that to a more suitable shape but retain the scallop detail

Please vote and save me some agonizing. 
I am looking forward to hearing your opinions.

Friday, February 24, 2012

Union Jack Playboy Bunny Costume Complete


 This is the completed replica Union Jack Playboy Bunny costume I embellished.

Which is to say that I did not make the base suit for this costume, but was sent the suit with reference photos in order to add the Union Jack Flag embellishment.

Lot's of handwork!

When the Playboy Bunny Clubs first opened this was considered a scandalous outfit...obviously long before Hooters or Strip clubs became common fodder.  
Now it just seems rather quaint.  The girls were schooled in how to properly bend at the knees to serve their drinks so as not to flash to much cleavage at the clientele....honestly.


This 3/4 view shows the lacing which was dyed to match the blue satin, and the iconic bunny tail.  

My dress form is a little more swayback and has a smaller waist then this suit so we do get some wrinkles across the back.

In order to sew the ribbon on I did need to open the costume at the side seam and crotch.

This suit has a placket under the eyelets which protects your hose from the rough edges.  The earlier suits had you place the eyelet in backwards so that the rough side sat on the front.  The placket is a great idea but does make placing the eyelets quite a bit more difficult.


How fun is this vintage picture of the gals greeting Hugh Hefner at Heathrow airport for the opening of the London clubs.

This is the only picture I have with ears embellished in this way.


Speaking of the ears.

Can you believe they went to the trouble of adding this extra detail.  Not all of the reference pictures I had showed this version, but my client of course wanted this special touch.

Makes you want to stand to attention yes?


Even the sides of the headband are decorated!


This is my charming husband Chuck Williams
"pick'n" at it. - LOL


Chuck is my art director and being a sculptor has a fine eye for the details.  He likes to point out stray threads, missing beads or askew trim.....I will admit sometimes it tries my patience but he has helped me to elevate the quality of my work and is an excellent 2nd pair of eyes when you need it.

Thanks for that hon:)


What do we think dear readers...
cute or scandalous?

Friday, February 17, 2012

Eva Dress Contest - Blouse 7482 Complete


 So happy with the way this blouse turned out. Very flattering style and so comfortable to wear. 


 I tried to make it authentic to the period (1938), which is to say no serging/ overlocking inside.  Instead I zig-zagged the seams with the fine thread at the bottom of the picture and used an all purpose for the seaming.  I thought about hand casting the seams.....but having just completed the Indygo jacket, got over it:)


 I looked on line for suitable buttons but in the end decided to cover some 7/16" half domes.  
The pattern shows you how to create button loops from thread, but I decided to make self fabric loops. 


This shows a close up shot of the buttons and spaghetti which makes up the loops.  The 2 buttons on the left are face up and the 2 button on the right show the back.  The buttons required 2 layers of fabric so the metal would not shine through.  This meant that there was to much bulk to snap the metal backs on...they just kept popping off..which meant I needed to do a proper job and cover the back of the button as well.  I am so glad that I did.  Don't they look pretty?


I interfaced the facing, front and back with 1" strips of silk organza.  I did not follow the directions for assembly of the shoulder seams but reinforced the seam first with stay stitching, clipped into it and sewed it with right sides together, just as you would for a shawl collar. 

The pattern has you tie a bow at the front, but I felt the single loop was a little less bulky and contemporary looking.  The bow is very cute though and when I make it again in a chiffon I will more then likely do so.  In the wool it just felt a tad bulky to me.


Look at this awesome picture I found while looking for garments of the period.  This is the cover of Du Barry Fashions in 1938.  A very similar style in the same color.  Mine photographs much brighter but really reads this color in natural light.  Now I just need those fabulous gloves!

After filling out my project worksheet I found this garment cost me $24.10
The blouse requires 1-5/8 yard and I used a wool I had in my stash that was gifted to me by a client so there is no fabric price reflected in my total.  I probably would have included it if I could remember what she paid for it...but alas that paperwork was filed eons ago..in a galaxy far far away.  One of the benefits of sewing for others is you are sometimes left with usable "scraps"....Oh Joy!

For more information about this project see post list below:

Tuesday, January 31, 2012

Eva Dress Contest - 1937 blouse #7482 Muslin


Here is the muslin for my Eva Dress Contest entry.

I love this blouse.  I was a little surprised by the amount of fullness in the sleeve cap and initially thought I would reduce it a touch.  But that would not be holding to the rules of the contest....and when I tried it on, it just looked great!  I love the way the neckline curves up onto the neck, don't you?
Chuck says "Wow! That is perfect for you...very nice"

I am pleased and looking forward to making it up in my wool challis.

Now about the pattern....
The instructions for sewing the neckline facing and attaching the lower bodice to the upper bodice are .....out of date, although possibly easier then how I chose to do it.  There is not a separate neck facing, just extensions along the front and back neck edge that get turned back and blind hemmed in place.

The instructions want you to overlap the shoulder seam - meaning fold back the seam allowance along the back shoulder, gather the front shoulder, Lay the folded back shoulder onto the front shoulder and edge stitch.

Here you can see the Blouse back, at least one shoulder and half  of the neck.
I stay stitched the edge, clipped into it and placed the front shoulder to the back shoulder with right sides together and stitched.  It is a bit tricky getting around that turn, similar to a shawl collar. Once both shoulder lines are sewn you can turn your facing back and blind stitch as suggested.
This technique is repeated to attach the lower blouse front to the upper, but again I placed right sides together and stitched.  You could certainly add the edge stitching after, if you like the look.

From here I will play with the gathering distribution on that sleeve cap, this might have been a misunderstanding of the patterns marks on my part.
Can you see the difference between the illustration and my muslin?  Yikes!


I also need to adjust the sleeve hem and placket which is simplicity itself as it has no placket piece, but has you create a placket from the under arm sleeve allowance and using hem tape to finish.  For authenticity's sake I will finish it that way.  The hem line though is uneven forming a peak at that underarm seam, which needs to be leveled out.  This might have occurred when I adjusted the length of the sleeve....I will be sure to post a tutorial on how to fix that simple and commonly found error.

Wednesday, January 25, 2012

The Eva Dress Contest - The 1937 Blouse begins


Last week I mentioned the Eva Dress contest and showed you the 1940's Playsuit pattern I am planning on making into Gardening Overalls.  

Today I thought I would share my other possible entry this 1937  Blouse which I plan on entering in the 3rd Category, which is described as: The Best use of pattern in its original form.  The garment must follow the pattern devoutly (meaning no changes to the design, although grading or alteration for proper fit are appropriate.


The pattern number is 7482 and it is available in a size 16 (34" bust)

This of course is my project worksheet for said blouse.
I am making it from a lovely burnt red wool challis.

Needless to say though before I can cut into my fabulous fabric I must trace the pattern and sew up a muslin,   This is strongly recommended on the pattern as these are original period patterns.  This means that the markings are minimal and unfamiliar to the contemporary seamstress, and the sizing my be different as well. 

I traced my pattern out onto wax paper, a method I often use as its very transparent , inexpensive. It's easy to make as wide as needed by simply overlapping the sheets by a few inches and ironing. 

I found it helpful to refer to the sewing directions as I was tracing to insure I was understanding the marks.  The pattern included a nice diagram of each pattern piece with additional information written on it.  For instance where the gathering happens between dots the diagram will say "gather", the grain lines and hems are marked with dots, but the diagram helps you to understand which is which.

The pattern only has 5 pieces and the construction looks very straight forward although again a little different then contemporary methods, but I will talk more about that as I move into the construction.

Upon measuring the pattern I found the actual pattern measurements to be:
Bust - 37"
Waist - 33"
Hem Circumference - 37"
Center Back to waist length - 17"
Sleeve length - 25"

The only pattern alteration I made at this stage was to shorten the sleeve 2".  1" above the elbow and 1" below.  The bust may prove a little small for me and the waist a little large but I will sew up the muslin before I make those changes.

Hope to see you soon with the muslin...wouldn't it be nice if I could get that sewn up this weekend:)

What will you be sewing this weekend?
Have you ever made any of the Eva Dress patterns?
Will you be entering this years contest?

Monday, January 23, 2012

Eva Dress contest & Sewing Project Organization

Today I thought I would share with you how I catalog my sewing projects and  ideas.  When the pieces start coming together for a project I like to organize them in such a way that I can track my time, ideas and expenses.  I do this for clients as well as my personal sewing.  

It begins with a form I made which was inspired by Roberta Carr's worksheet as found in:
 "Couture The Art of Fine Sewing"

You are welcome to download my form and use it for your projects.  You can find the form here

For the Eva Dress Contest I am planning on making this 1940 playsuit


My plans for these overalls are to use them for gardening although I am seriously haunted by making silk pajamas as well.  
Just Imagine how luxurious I would feel wearing a silk charmeuse playsuit with my Indigo Junction bed jacket?  
Can you say "Mr D'Mille I am ready for my close up"?

Alas the sensible side of me says I need something fashionable and serviceable to garden in.  Which would mean cotton lined linen overalls with some cargo type pockets to carry tools.  I also want to be able to roll the hem up, to keep them out of the water.  In order to accommodate that I will add some straps inside the side seam which will button to the outside side seam.  Not sure yet what I will use for the jacket, which I will most likely need.  A lightweight cotton shirting would  suit as it would protect me from the sun and bugs.

 I put in as much information as I have to begin and then I will add to the worksheet as I progress. 
 Under the Pattern Alterations I make notes about size changes I make. 
 The Design changes is where I list...well changes I want to make from the original design of the pattern.  As I am doing that I will make notes about any special cutting issues I might need to consider and list them under Cutting notes.
I think you get the idea:)

At this stage of the project nothing is written in stone. The sheet serves as a reminder and reference.  I slip the sheet into a sheet protector and place it in my project notebook. When I want to start something new, usually as I am finishing up some other project I will flip through my notebook and see what beckons.   As I finish them I move them to the back of the notebook so I can refer to them later.   Sometimes I think I know what I want to do with a particular fabric and I create a project sheet for it, but I can always change my mind later if I find different pattern or need.   

I like to use these when shopping for additional trims and notions all the info is available and easy to carry along.  Once I start working on them I pin them to my bulletin board for a constant visual reminder.  Currently I have 4 of them pinned and in progress.

Do you have a way you like to organize your sewing projects or would you rather not bother and just dig in?


Friday, January 13, 2012

Victorian Bodice Thrift Store Find

Late this summer I stopped by a local thrift store, one which I have not been into for years, to shop for vintage sewing items.  Upon walking into the dust and gloom( very grandma's attic like) I spotted this brown silk taffeta Victorian bodice!!
Warning! This post is very photo laden, so it may take time to load, but if you are a fan of Historical dress I hope you will find it well worth the wait :)


 Simple and so lovely.
It measures 34" at the bust and 25" at the waist, 12" across the back


All of the latest fashion with it's origami folds has nothing on these Victorian forerunners.
After doing some research I would place this Cuiraisse style bodice from about 1880.  
The fan detail here on the back suggests that the skirt that originally went with this bodice had a slim front with back bustle. 
 Similar to the picture below of Lumina Garnier

Photo courtesy of  Garnier Family Photo collection
Are you ready for the detail shots?


The bodice has 18 shell and metal button.  Very difficult to photograph I might add.  
The cut silver disc sits on top of what appears to be black mother of pearl which has a fluted edge.
3 of the buttons are missing :(


Sleeve cuff detail  on the 3/4 length sleeve.


The pleating/folds which would lay over the bustle.


The hand worked buttonholes which are more then half covered by the front tucks.


The interior is flat lined with brown twill and has one bone along the center back seam which extends past the waist. The inside placket piece closes with hooks and eyes at the waist.
you can see the selvage edge of the fabric along both center fronts. 


The seams appear to be machine sewn and hand overcast.
This shows a the intricacies of the back pleats/folds


I picked out a few stitches at the top of the bone casing to reveal the type of boning used. 
I believe its reed but have not confirmed this.

A final shot of the interior with the price tag still attached.  
The inside of the collar shows some loose threads which suggest that lace was sewn in at one time or perhaps a velvet ribbon?  Nothing similar at the sleeve cuff which could have been a possibility there.

This bodice still needs to be cleaned which I am still doing research on but I am thinking of making a skirt to go with it, so that it can be properly displayed.

For all my blogging friends who have a passion for historical clothing I would welcome any suggestions and information you would be willing to provide on its proper restoration.

If there are any other pictures or info you would be interested in, in regards to this bodice please feel free to ask.
 I will be happy to oblige:)

Related Posts Plugin for WordPress, Blogger...