Sewing Cafe

Patterns, Tutorials and Works in Progress from the Sewing Studio of Lynne Williams
Showing posts with label tutorial. Show all posts

Monday, August 12, 2013

Fitting Workshop by Fabulous Fit

Just received this notification in my inbox and how could I not share it with you all. 
 The price is right at $69.00 and it seems a great opportunity to learn about how to create proper ease amounts in your clothing or costumes without sacrificing style. 

Saturday August 24th from 2-3:30pm (eastern time)


Below is a excerpt from their site about the workshop

Universal Fitting Solutions is designed to help you with your day to day fitting challenges
If you have a passion for sewing, and yearn to make clothes that fit, you’ll save money, time, and avoid tedious fittings with this workshop.  By applying a few simple principles to your fitting routine, you will teach your hands and your eyes to connect, which will change the way your clothes look and feel.

If your goal is to overcome your fitting challenges, or get a professional insight on fitting, the ”Universal Fitting Solutions” workshop is for you!  Sewing is a passion, and using your skills to create fabulous clothes is just amazing!

The great thing about our live workshop is that you can ask the questions; as we believe that the best way to learn is to ask, discuss and share with others.

Things that may appear difficult at first will be approached from a different perspective.  Fitting clothes becomes easy when you know the rules of cause and effect. You will learn how fabric falls and how your clothes can move with you. “Universal Fitting Solutions” is an eye opener for anyone who wants to create clothes that fit and move with ease.

Here is the link to learn more and sign up.

Tuesday, May 22, 2012

1912 Project Blouse #1000 Muslin Complete

I took a half day off of work, which is to say cape sewing, to finish the muslin for blouse #1000.
The last time we looked at the muslin it still needed its sleeves, front waistband and collar.


Now it has all of its appropriate parts.....attached even - lol
You can just see a bit of the front waistband.  I cut 2 pieces 1-3/4" x 12-3/4" to create the waistband and waistband facing.  This creates a finished waist measurement of 24".
Take one of your waistband strips and press to the wrong side along one long edge and both short edges 3/8".  This will become your waistband facing.
Sew the waistband onto the shirt front gathering between dots. 
Repeat with the facing piece, sandwiching the blouse between the two and being careful to leave the facing free from the seam allowance edge on both short ends.
Press your seam allowance towards the waistband.
You can now sew your side seams.
Once you have attached the peplum you can finish the waistband by hand stitching the facing in place to cover the seam allowance.


I love how in this angle you can really see the appropriate silhouette for the time period. A little more bust and you would have less drooping at the front waist. Remember my dress form is 2" smaller at the bust than the pattern measures.
  Notice though how this right(seen on the left) sleeve drags a bit to the back of the blouse?


This sleeve hangs correctly because the peak of the shoulder is siting in the correct place and the gathering is distributed correctly.  
You can replicate this by:
 Placing a notch on the front bodice 3/4" forward of the shoulder seam, that will mark the actual shoulder.  Remember how the shoulder seam favors the back of the blouse?
Now place a corresponding notch on the sleeve cap in the center of the tuck lines.  Doing this will make setting in the sleeve much easier and prettier.

The cuff does not quite meet at the center to expose the tuck detail, but some gathering is required to make the sleeve fit the cuff.  
The total amount of gathering is 1-1/2"  I placed dots (to gather between) on my sleeve pattern 1-1/2" on either side of center for a total of 3".  Stitch a gathering line between these dots and adjust to fit your cuff.


The pattern allows for a 1/2" finished placket and you might want to add a little more to this depending on the size of your buttons. 
The peplum allows for a little more fullness over the seat than my dress form has, but should accommodate a "real" seat quite nicely, maybe even a bit of a bustle.


I finished the collar by using a narrow piece of self bias as a facing strip.  
From the looks of my collar though it appears as if I may have one side on back to front.....I thought I double checked that, but that extra bit of lift there on the left side lets me know something is not quite right.


Boy you can really see it in this shot.  
The collar fits in beautifully though if you leave a 1/2" space at the center front.

Now its time to adapt a muslin for contemporary wear....But before I can do that I  need to rig a roman shade, alter a bridesmaids dress and cut out another Bat Cape.

What will you be sewing today?

Tuesday, May 15, 2012

1912 Project - Blouse #1000 - Muslin

I have made some small progress on my first 1912 project blouse..


This is the illustration that accompanied my pdf pattern.  There were no instructions but the templates for the embroidery work on the peplum cuffs and collar are included.

The pattern is labeled for a 36" bust
The measurments on the blouse are:
Bust: 37-1/2"        
Waist: 23"            
   Hip/peplum width at hem: 43"
Sleeve length: 15-5/8"    
   Bicep: 14-5/8"

My size 6 dress form measures:  Bust 35-1/2", Waist 24", Hip  34".


While taping my pattern together I noticed a few grain lines that did not match up....which makes me question my taping, but if  you follow the stitch lines you can't be to crazy off, right?....

  
Once the pattern was taped I began trueing it up.  The first thing you notice is that the back side seam measures 1" longer than the front.


The collar pattern has one of those mismatched grain lines and is not the same size as the template.  The center back seam is not indicated on the back pattern piece so at this point I am unsure which pattern is correct. 
There is no pattern piece for the waistband...hmmm

Additionally the tucks indicated on the pattern are in three different sizes:

5/8" on the fold, on the center front pattern piece
3/8" on the fold, on the back pattern piece
&
1-1/2" on the fold, on the sleeve

This is confusing to me and I am not sure if its a digitizing over sight or what.....
I chose to make them all the same size (5/8") because they look to be all the same in the illustration.  But the reality of the situation is it doesn't really matter what size you make because you need to stitch them up on your fabric prior to cutting the pattern pieces out.  
If you are unfamiliar with this process, no worries I will show you more about this when I make up the actual blouse.
For the muslin the tucks are not required, so you could skip this step for your muslin process if you like.


Here is my muslin without its sleeves or collar.  Fortunately I have a size 6 dress form, very helpful for this process, as it takes some of the guesswork out of it. 


The 3/4 view shows you how cleverly the fullness is kept to the front, while the rest of the garment hugs the body...and I mean hugs.


In this shot you can see how the side seam favors the back as it approaches the armseye.
You might be asking yourself at this point what happened to that 1" difference along the side seam..

  
I decided at this stage to baste the peplum on 1' higher across the back of the bodice. 
Once it was all together it occurred to me the difference in the side seam length might explain the missing waistband piece...Could the waistband sew to the front only making up the 1' difference needed to match up to the back?  Will try that next so stay tuned.

..
The shoulder seam favors the back as well, not at all unusual in garments from this period. 


And finally we have the back, which will fit better once that peplum gets moved down an 1"

I am looking forward to sewing the sleeves, collar and adding that waistband so don't forget to check back to see how that effects things.

This is my kind of mystery I tell you what:)


Sunday, February 5, 2012

Sleeve pattern correction

Remember my annoyance with this sleeve hem ?  Your hems in general should be level with your wrist or if its a skirt parallel to the floor. This is always the case unless you have an obvious design feature as seen with the new swallowtail hems or those elegant sleeve points which fall down over the hand and attach to your ring finger.

But I am looking for a standard and correct sleeve hem and so I will need to make some adjustments to my Eva Dress 7482 pattern.  So lets begin.....


This is what my sleeve hem looked like after making up the muslin.  The dotted line is my hem line.  The seam running up the center is my underarm seam which forms the placket at the hem.  In modern patterns the placket is sewn as a extra piece.  On this vintage pattern the buttons are purely decorative and this little placket closes up with a few snaps. 


I begin by pinning my sleeve seam together along the stitch line.  I can/need only do this for a few inches. Its a little awkward as it does not want to lay flat if I continue pinning to far up the seam.  
Once I do this I can see that where the seam lays, it needs to be about 3/8" longer to be even with the front hemline.


Because my pattern tracing is done on household wax paper I can simply take a strip of wax paper and add it to the sleeve hem by pressing with an iron.
If you use paper of course you can tape your strip on.


Now I re-pin my sleeve seam....

 
Turn it over and cut through all layers along the front hem cutting line.
In this picture you can see where the buttons are supposed to go.


 I open my sleeve once again and I can see my new curved hem line.
Now  I trim the excess wax paper off the sleeve seam.


This is my new correctly shaped hem and my sleeve is ready to be cut out:)

By the way that is my blouse fabric that the pattern is laying on, my favorite shade of red

Do you have pattern alterations that you commonly make that are not related to fitting?


Friday, January 27, 2012

Caped Crime Fighter - Dart & Godet tutorial

This tutorial covers the sewing directions on the WS1002 Caped Crime Fighter Pattern under
 "Cowl Sewing Instructions" steps 2-7


This is how your side Cowl #5 will look after cutting out and marking the darts and Godet cutting line. Cut along the Godet cutting lines an inch or two.
Do not cut any deeper until after the darts are sewn.


Step #2
Fold the darts with right sides together down the center and place pins at each end.
To insure your darts are accurately sewn.  Pierce the fabric with your pin along the front stitch line and straight through to the back stitch line as shown.

Continue to pin along your dart stitch line and then sew from one end to the other.


Always press your dart flat first being careful to not press beyond the point, which would cause the dreaded dimple. 
 Once the dart is pressed flat you will press the dart that leads into the godet towards the front of the cowl.  The lower dart which touches the hem line will be pressed towards the back of the cowl.


 Step #4 & 5
Moving onto the godet piece #7 - It is important that you mark the dot located at the apex of the godet. 
You will notice that one side of the godet is slightly shorter then the other.  The longer edge gets sewn to the longer/leading godet cut line.  
You can now cut the godet cut line to within 1/2" of your sewn dart.


With right sides together pin the dot on the Godet #7 to the very end of your sewn dart.


Place another pin at the bottom edge matching the cut line.  
The cut line will not match along the entire edge. 
Sew from the dot  maintaining  a 1/2" seam allowance along  your Godet cut edge.  Your bottom edge may or may not match depending on the accuracy of your cutting and dart sewing, but don't worry if its a little short or long, this will get trimmed when you finish the hem edge.


This is what you seam line will look like from the cowl side once sewn.  


I realize this part is scary...but you will now continue cutting along your godet cutting line right up to the end of your dart and beginning of your godet stitch line.


Step #6 

Flip it over so your right sides match again and the opposing cutting line is "matched up with your opposite godet edge.  You will pin as you did the first, matching the cut lines at the bottom.  Sew from the top to the bottom maintaining your 1/2" seam allowance along the godet only.  The godet cut line will have a very narrow seam allowance at the top gradually ending in the 1/2" at the bottom.  Here you can see that my hem lines don't quite match...no worries because remember you will be trimming that when you finish the hem.


Step #7

Press the godet from the right side making sure the seam allowance is laying nice and flat.
From the right side then stitch in the ditch along the edge of the dart grabbing the top tip of the godet to secure.

Now repeat for the other side and your side cowl pieces will be ready to sew to  your center cowl piece.  

Please leave a comment if you have any questions and I will respond back as soon as possible.

Hope you have enjoyed learning a new skill:)

Thursday, October 13, 2011

Caped Crime Fighter - Cape Sewing Tutorial


Okay Bat fans are you ready to sew? 

 Does your machine have a new  size 10 sharp needle in it?  
Has the bobbin area been cleaned out recently, within the last 24 hours?  
If not make sure to do this and check your tension on a sample piece of cape fabric before preceding.  Satin is very unforgiving and uneven tension will result in puckered seams.  Additionally fluff in your bobbin area will get drawn up by your thread, again resulting in uneven tension.


This tutorial is not meant to replace the directions that came with your WS1002 pattern, but to compliment them with additional tips.  

 To begin let's discuss why we have carefully marked our seam allowances.  In the image above you have a piece of cape satin.   The selvage/lengthwise grain edge is on the right, and the chalked line is on the true bias, or 45 degree angle from the selvage.  Seams that are sewn on the bias or even off grain will want to stretch as you sew the seam.


 Here I am stretching that seam.  I highly recommend you try this on a sample if you are unfamiliar with this attribute.  When you sew an off grain seam and do not stretch the seam moderately as you are sewing it, the fabric will stretch out around the seam creating the appearance of a short seam with folds of fabric cascading from it. 


The center back seam is on the straight of grain, but the side seams of the cape fall off the grain.  Pin the seam as shown above being careful to pin through your marked stitching line.  Place the pins so that you can remove easily as you approach them to sew.  Sew your seam with a short 2. stitch length and apply a moderate amount of stretch as you sew by holding the fabric in front of and behind the foot and creating tension, while still allowing the fabric to feed normally.  You will notice that your seam allowance narrows as you apply tension, this is why we marked our stitch line to prevent you from making your seam allowances to deep thus making the cape smaller.


Once you have your cape and cape lining sewn together along the front edge, you need to anchor the lining seams to the cape seams.  This inhibits the cape from bagging out between the layers. 
 On Adams original cape you will occasionally notice some hard pressed wrinkles around the hem. 
 Capes are not generally sewn together at the hem due to this problem which was minimized on his cape by this anchoring technique.
The picture above shows the two seam allowances, one from the cape, and one from the lining  being tacked together as the directions indicates.  
Be sure to follow the directions (step 5)as to placement of these tacks.


Step 8 instructs you to pin your prepared neck binding to your neckline and press it so that it curves to fit.  Make sure your binding lays nice and flat. 
 It will do this because you have cut it on the bias which allows it to follow a curve.  
This same neck binding cut on the straight of grain would not be able to do this.


Once your neckline is under stitched and pinned to the wrong side you Prick Stitch the binding to the cape along the folded edge.  A prick stitch is accomplished by sewing from the outside of the cape.  It is done just like a back stitch, but with the back stitch being very small on the top edge.  In the picture above you can see a sample being sewn using white thread.  To see a video of the prick stitch being sewn click here

Your finished neckline will look something like this. Notice the tiny stitches on the outside and the longer stitches along the binding edge.
This stitch takes some practice to get even, but that is what you trying to achieve, consistently even stitches.

The next few steps should be self explanatory, so let's move onto the infamous hem.


Your hems should now all be fused with the bias tape and the seam allowances cut back to match the shape of the hemline as seen on the lower side of the picture above.  Now that your seam allowances are all cut back carefully pin the hems together matching the cut edges.  With a short 2. stitch length straight stitch the hems together 1/8" from the edge.


To set up the sewing machine for this final step you will thread 2 black spools through your needle.  Most machines have 2 thread spindles for this purpose.  Adjust your stitch width until your finished zig-zag stitch is 3/16" wide.  Shorten your stitch length so that it makes a nice tight stitch a little longer then a standard buttonhole stitch.
 Again always make a sample first to check your results.
Position your foot as seen above when you sew your zig zag so that the right edge of the stitch just falls off the edge of the fabric, wrapping the stitch around the matched cut edges.
After all of this you will have some fraying which extends beyond the sewn edge, this can be trimmed back closely and will, for the most part eventually wear away.
The original cape was hemmed in the exact same manner.

Now pat yourself on the back for a job well done, or drink a nice glass of wine, if you haven't started already and get ready to make a cowl:)

Please feel free to leave any additional questions you may have, by commenting on the post.  If you subscribe to the post,  you will then receive the follow up questions and answers:)  Additionally it lets me know if the the information has been helpful to you:)

Saturday, September 24, 2011

Caped Crime Fighter Cape - Cutting and Marking


Your replica Batman cape should now be altered and ready for cutting.

Before we begin...
We need to discuss that satin can be directional meaning  the color will appear darker in one direction over the opposing direction....say what?


To demonstrate....mark one cut end of you satin "top"


Notice that when I flip one around how it catches more light then the other.  This property of satin if not addressed can make your garment look like it has been sewn with two different colors.  It is sometimes difficult to see in small pieces,  tragic when seen in larger sections.  I always advise avoiding the possibility altogether by careful cutting.

To begin  cut or tear your satin into 4 lengths of 60" each. Label the top of each length as you proceed to insure that your satin is running in the same direction for all of your pattern pieces.
To help conserve fabric you will be placing the pattern pieces in opposing directions as the lay out shows.  You will use one direction for your "face" or outer layer, and the other direction for your lining layer.
Being careful that you end up with 2 front , 2 front linings, 2 back and 2 back linings.


 Lay out both your cape front and back as the pattern instructs, but you will only be able to get one set out, the 2nd set will be cut from your other 2 lengths.


 With dressmakers carbon mark your seam allowances  and scallops on the wrong side of all 4 pieces.

  Additionally you will need to mark your snap location with tailor tacks.
 I like to use light blue thread for the male snaps and pink thread for the female snaps.


 You can now cut your pieces along the cutting lines except for the scallop hem.
For this I leave a generous edge around until I have fused the bias tape along the scallop.
Be sure to label your cut pieces by placing a low tack masking tape on the wrong side of the fabric, to insure you do not confuse your lining pieces with your face/outer pieces.

Repeat this with the other 2 lengths, laying the pattern pieces in the opposite direction of the first set.
Mark your seam allowances again with dressmakers carbon, tailor tack your snap placement and label each piece. 
The fusible bias tape used to control the seams.
Next to insure that our front edge stays crisp and hangs correctly and that the scallops in the hem retain their proper shape we will fuse a wonderful product called Design Plus bias fusible along our stitch lines in critical sections.


 You will iron this tape centering it over your stitch line down the center front on the face/outer side only.

You will than iron the tape along the inside edge of your marked hem.
 If you are using a taffeta like satin you may only need to do this on your face/outer side.  If you are using a silk satin or light weight poly satin you will want to fuse both your face/outer and lining hems.
 I highly recommend you do a test scallop on your fabric to determine what will be required.

Leaving the excess fabric makes the hem more stable and less likely to change shape as you press.
Additionally you can  keep the pattern pinned to the fabric just above the marked line. The tissue will help it retain its shape.
 Once you have it fused  your bias tape on you can trim off the excess fabric right along the edge of the bias tape.  Because this tape is cut on the bias it forms around the curves beautifully as you press it and will now stabilize the scallop shape for the finished hem technique.

In the next installment we will sew the cape and master that tricky hem.

Please let me know if you have any additional questions.
Should I start a Flickr group so you can post pictures of your progress or completed items?

Saturday, September 17, 2011

Caped Crime Fighter - Cape Alterations

 Look familiar Bat Fans?


 Here we have a replica Batman cape from the Iconic 66' Batman t.v. show starring Adam West.  This cape is made from a Poly Satin, is self lined and made from Williams Studio 2 Caped Crime Fighter Pattern...from yours truly:)

As you can see the cape is not particularly full and the pattern fits a  40- 42" chest.  If you are larger then this you will want to alter the pattern to fit your larger chest size.

Today I will show you how to accomplish this.


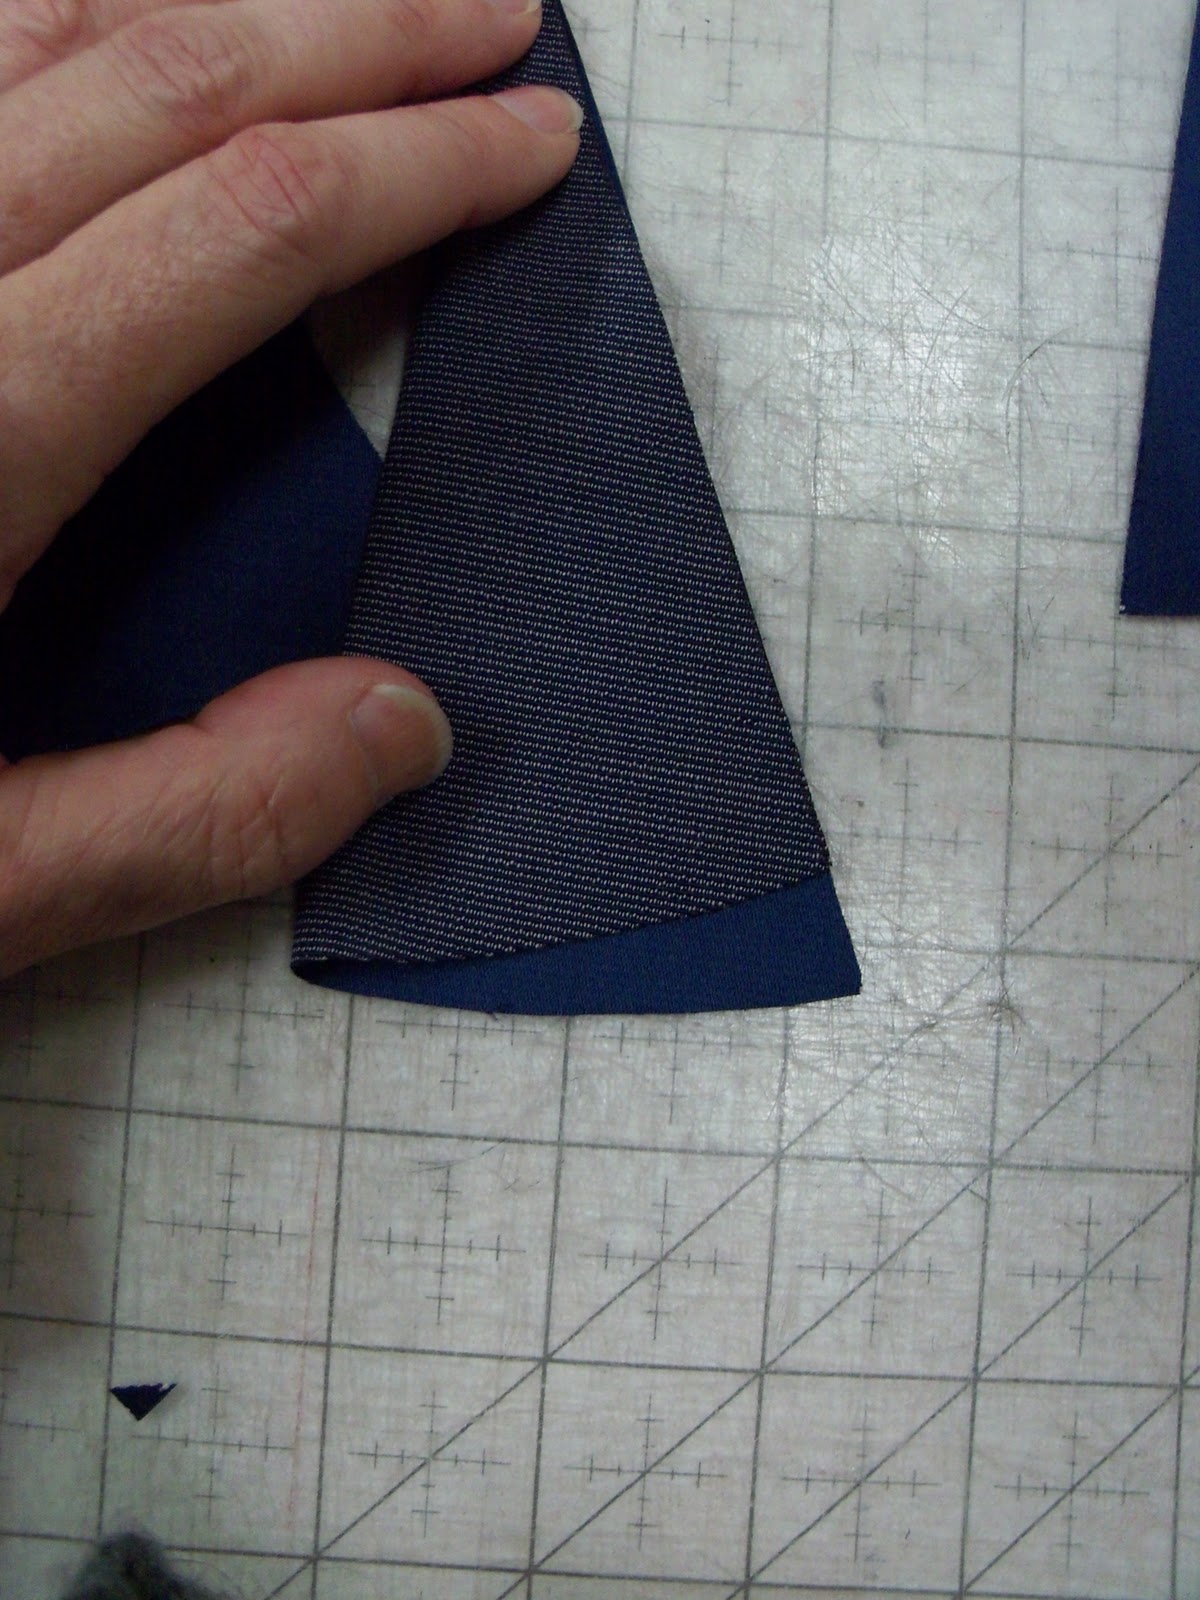
This shows the back of the cape in the Poly Satin.

The cape length is 51-3/4" from the back neckline to the end of the center point, which should just graze the top of your boot in the back. Adam was 6'2 and slim of build.  If you are more barrel chested but the same height you might require more length.
 See Why at Fashion Incubator

The width around the cape below the shoulder is 52"

Measure around your chest and arms to get a width measurement .


To alter your pattern you will need:

  • WS1002 Caped Crime Fighter Pattern
  • Tape measure
  • Tape - My preferred tape is soft cloth tape as found in the pharmacy/bandage section.  It does not tear the tissue, remains flexible, and can be removed if needed.  
  • Pens - Blue and Red
  • Rulers - A fashion ruler if you have one is helpful
  • Paper/tissue - golden threads, newsprint, tissue,
  • Your personal measurements - width and center back length


To begin remove your cape front and back pattern pieces from the tissue.  You do not want to cut out on the line, but just around the pattern pieces.  Press them to remove any folds and wrinkles with a dry iron. 

Now I am afraid we need to do some math...
 Fortunately for us I have a client I am currently making a cape for and so we will use his measurements as an example, but you will of course need to adjust accordingly.
  My clients chest/arm measurement is 62" which means we need to add 10" in width and we need to make it 1/2" longer.

To  maintain the correct look of the cape you need to add evenly around slashing and spreading through the center of each hem scallop.  
Mark a line(indicated by the blue vertical lines above) that begins at the mid point of each scallop and extends up through the shoulder line. 
 One of these lines will run along the dotted stitch line at the side seam.  
Mark another line(shown in red) perpendicular to the grain line(short black line) on the pattern.
Repeat this for both front and back pattern pieces.

Let's now determine how to divide the amount we need to add to our circumference.
Our pattern is only half of the garment, so begin by dividing the total amount required in half. Since I am adding 10", half of that is 5" 
Half of the pattern has 5 hem scallops and so I divide my 5" by 5. 
 This means I need to add or spread each vertical line by 1"
The scallop along the side seam falls into the center, so we will add 1/2 the total between the 2 side seams.  For me this means 1/2" along each side seam, adding 1" total.  

Still with me.....Cut narrow strips of your extra paper. I had some Golden Threads in the studio so I cut narrow strips that were slightly longer then the length of the pattern.


Cut your pattern along one of your  blue vertical lines, tape a narrow strip of extra paper along one edge.  
Extend your Red line across the strip and place a cross mark the amount you need to spread.  That is 1" for me.  Tape your pattern back together maintaining the correct spread width along the length and being very careful that your red line remains straight as well.  Once you have taped the front, turn the pattern over and place tape along the back of the pattern as well.  Repeat this step for the 4 blue lines that run through the body of the pattern.


Your shoulder line will be all a jumble now, so you need to redraw it, or blend it.


This is where a fashion ruler can come in handy, it has a nice gentle curve on it for pattern drafting.

Next we need to lengthen or shorten our cape.  If you are lengthening you will cut along your red line and spread it as you did the others the desired amount.  For my cape that was 1/2".
To shorten draw another line above your red line the amount you need to shorten the cape.  Now fold the red line up to the new line and tape securely.


Once the length is adjusted we can finish spreading our pattern by cutting along the side seam stitch line, starting at the bottom and cutting up to the shoulder curve point.  Do not cut through the pattern here, but leave a hinge so that you can spread the seam open the desired amount.  That is 1/2" for me, or half of the total amount you did on the other spreads.


This is about what your finished pattern piece will look like when you are done. 

Congratulations on altering your cape pattern.  If you have any questions please feel free to ask and I will do my best to answer them for you promptly.

Now that you pattern is ready I highly recommend you cut it out and sew it up in muslin or waste cotton so that you can make sure the width and length are correct for you.  You do not need to sew up the lining, a single layer should give you a good idea of  the over all fit.  Remember the front of the cape does not overlap at the chest. 
Related Posts Plugin for WordPress, Blogger...