Sewing Cafe

Patterns, Tutorials and Works in Progress from the Sewing Studio of Lynne Williams

Wednesday, February 27, 2013

Dress Form Evaluation - Duct Tape forms

Today we begin the discussion about customizing dress forms.  The elements that I find essential from professional forms which can/need to be applied to our customized forms are:

A firm pinnable surface
Correct seaming
A solid stand 

Duct tape form by Williams Studio 2

One of the traditional ways to achieve customization is to add batting to an existing form.  This requires that the form is smaller then you in circumference, but only by an inch or two.


You can see another example of this here
 When you pad a form out dramatically it becomes to soft.  By to soft I mean that your garment can actually distort the form underneath and you cannot stick a pin straight into the form and expect it to hold.

The only exception to this is cup size.  If your purchased form replicates you exactly except for the bust size, by all means put one of your old bras on the form, fill out the cups and dance a jig.  You are good to go:)

For most of us though it will be more complicated then that.  
The Duct Tape form is certainly an excellent way to achieve a custom form, but to really have a working form you need to follow thru on the process.  What do I mean by that?
Courtesy of Threads Magazine
 The above form does not have seams, a pinnable surface or a stand.

A duct tape form requires a good friend $100 dollars and a few hours to complete the mold which will become your working form.   Many people stop at this stage but a hollow form which hangs from the ceiling is certainly not ideal or very useful.  
Completed Duct Tape Form by Lynne Williams

Now this is more like it, don't you think.

When making your form take it a few steps further by filling the form with expandable foam (in stages, this is very important, because if you don't it will bloat out your mold distorting the final shape).  
Once the duct tape mold is filled  remove the the duct tape, add a thin layer of batting and then create a cover and a stand for it. the cover is what supplies you with your correct seaming and it looks nice.  This generally brings the supply list up to $150-250.   It takes 2-3 days to fill the mold with foam and another day to make a pattern and sew up a cover.  In addition you will want to make at least one arm for it.


A note about these forms....do not include your arms(which I see pictures of allover the Internet), replicate the look of a professional form because the arms are not on them for good reasons!!  Solid arms on a form will limit what you can actually put on the form.  Remember professional forms collapse at the shoulders (see previous post) to find out why. 
Custom Dress Form by Lynne Williams
 In Ateliers and costume departments they use a easily made detachable arm like the one you see here.

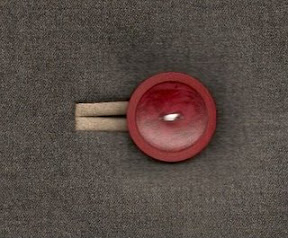
Dress Form Stand by Williams Studio 2
In addition you will want to add a sturdy base and there are lots of suggestions out there for this. PVC, an iv pole, plumbers pipe will all do the trick. The base above came from a plant stand which I fitted with plumbers pipe and then spray painted black.  You can set them into the form by drilling a 8" deep hole into the bottom of your form and setting it in place with more expandable foam.  It's not adjustable but could be made so if you required that.

I hope you are finding this series useful.  
Please leave comments and ask questions.
Next time we will discuss customizing the Uniquely You Form

Saturday, February 23, 2013

Couture Inspiration - Valentino


Last night my husband and I watched Valentino.  
It's beautiful, educational and inspirational.
A glimpse inside fashion history and an amazing working relationship
Fabulous scenes of France and Italy

It had me re-thinking almost every sewing plan I have and made me desperate to vacation somewhere with a fabric store and cafe-lol

We were snowed in again yesterday about 6" of a rain/snow mix which did allow me to get some cowls sewn up

 and dream about a winter white jacket I wish to make or slacks...
What about that blue silk batik top... the black leather spencer...the wool circle skirt with tear drop hem and oh yes I still need to finish my lovely butter colored silk chiffon revision blouse.

What will you be sewing today?


Friday, February 22, 2013

Vogue 8648 - Muslin

I have been enjoying my Craftsy Couture Dress Class with Susan Khalje immensely.
She is an excellent instructor, and I just love learning new tips!  Personally I like the couture process of hand stitches, basting, careful manipulation and complete control.  It brings order to a chaotic world and helps me calm down.  I appreciate that it is not for everyone, which is fine.  Hopefully there is room for everyone at the sewing table:)

This is my muslin for Vogue 8684.  One of the suggested patterns for the class


I made very few alterations initially to the pattern outside of my fba.


I like using my above bust measurement as the starting point and comparing that to the full bust on the pattern.  This generally provides the more secure fit that I prefer.
In this instance though it did require that I give myself more room all around..sigh. But if I had gone up one size it would have been to wide at the shoulder, so it all works out and this is the advantage to making your muslin.
I released the side seams 1/2" on both sides, but then took out a scant 1/4" on the skirt front princess seams.
  
The back princess seams were let out that same scant 1/4" from the hip line down to the hem.
I used my dress form for this initial fitting and look forward to seeing how they transfer to my actual body.
I will say its a dream for seeing proportion and balance.


This piece of merlot silk dupion is a possibility for this dress.  
Someone just might invite me to a cocktail party or wedding and I think this might be suitable.
Wouldn't it be nice to have a dress in my closet, ready to go, for just such a possibility?

I am currently playing with what grain lines I want to employ on this garment.  If I put the entire garment on the cross grain the slubby texture will run the length of my body.  The pattern calls for all of the side panels to be on the bias and I am not sure yet how I feel about this.  I do love the way the bias works but will I like the way it looks?  I am kind of leaning in that direction just because it sounds fun, but what it really sounds like is that its time to play with the fabric some, and take some more pictures:)

Any thoughts dear readers?


Thursday, February 21, 2013

Sewing Studio - Bat Cowls


We have had a recent flurry of orders for Bat Cowls and so today I began cutting a batch out.
You may notice my new toy on the table...a Nook
Love my Nook!
 I have pattern books loaded on it, very helpful, but today I listened and glanced at Susan Khalje Couture Dress class.  
Yesterday it was Claire Schaeffers couture techniques.  
Are you recognizing a theme?
 I will admit that I am treating myself to Susan's class and actually making myself the dress. 
My muslin is all prepared when what to my horror did I discover...I am completely out of silk organza!!  How did that happen?  
While I wait for its arrival I have plenty of work to do, which I am very grateful for, but it does interfere with my personal projects- lol

Hope you all are enjoying your sewing:)

Tuesday, February 19, 2013

Dress Form Evaluation - Personal Fit

I find these truths to be undeniable ...

For personal dressmaking you will find that a dress form that replicates your body will be the most helpful.  Any standard form that is purchased must be adjusted to suit.
Dials that change the length and width will not accurately represent your personal shape.
You must create a cover that replicates your body....why..
are your...
 shoulders sloping or square?
neck forward?
bust high or low?
sway back?
full in the tush?
wide at the low hip?
crooked?
dowagers hump?
An A cup, or C/ larger ?
Over your ideal weight?
A standard form, as purchased off of the shelf (so to speak) will not address any of these issues. 
 All of which dramatically change the way any garment hangs on you. 

Let's compare 2 forms which have very similar measurements to illustrate my point.


The form on the left is a Fabulous Fit form with measurements that are the closest to my personal measurements.  The form on the right is my personal dress form created using a customized cover over a Uniquely You form.
The Bust and Hip measurements are the same, my waist is 1" larger(currently) then the FF form.

The differences are the shoulder slope, hip shape, waist line tilt, bust cup size, center back length and thigh circumference. 


From the front notice the difference in the shoulder slope?  
At the hip you can see that my hip shape is not as square. 
 The widest part of my hip is the same measurement. 
My crotch depth is longer.
 My thigh is fuller.


Back to this image which shows the tilt in my waist and the curve of my upper back.
The center front measurement on these forms is the same, but my center back measurement is 2" shorter then  the FF form!
My neck position is also more forward...due to all the sewing actually..so take heed girls
My bust is a C cup and the standard on forms is a B.

The point of all this is that although I can put my clothes on the FF form, they do not fit properly.

If you are going to have a dress form in your sewing room and you want it to be a truly useful tool you must customize it properly to fit you.  With out the custom cover you are not getting the full benefit of your form.  

Any design analysis you do will be handicapped by it not having the correct proportions.
Any hemming you do will potentially be uneven due to it not sitting at the waist or shoulders properly. 
Any pattern making will require alterations to fit afterwards,
 and your fitting will be inaccurate.

In our next Evaluation we will look at customizing an existing form for personal fit.

Once again, please feel free to ask questions or share your personal experience with us.

Sunday, February 10, 2013

Dress Form Evaluation- Part 2 - Professional / Industrial

Sunday Again!  That means its time for another Dress Form evaluation installment.

Last week I posted a list of what I use my dress forms for so lets refresh.

                                            1. Design analysis
                                            2. Hemming
                                            3. Draping / Patternmaking
                                            4. Fitting
                                            5. Decoration


 Obviously any dress form will work for decoration and in fact the more decorative it is the better:)


Industrial Dress forms like Wolf, Superior, Fabulous Fit, etc have some better features then those made for the home sewer. What I mean by better is that they make your job of 1) designing, 2) Hemming 3) Pattern making, and 4) Fitting easier.  

Let's start another list shall we?

1. Collapsible shoulders and sometimes hips.


The shoulders on professional forms collapse into the body from the waist to allow you to put clothes on over the top.  
This replicates how you curve your shoulders forward to avoid unzipping the zip.  
This feature is exclusive to professional forms.  
It is helpful in getting finished garments on and off the form. 
 It is also helpful borderline essential when creating strapless garments. 

2.  A heavy metal base with wheels 


 This allows you to drag the form around the studio by the neck or shoulder with out tipping.  It also allows you to apply some pressure for draping and pattern making with out falling over. The foot pedal raises and lowers the form securely adjusting the height for comfort and or hemming.
Not a critical feature for any of our needs, but it does make life easier:)

3.  An accurate seamed cover 


 This feature accurately identifies the Center Front/Back seams, princess seams, neck and side seams. panty lines, bra lines, etc. These seams can be felt through your muslin or most fabrics to help you identify where pattern pieces are to large or to small. 
This is critical for 4 out of 5 of our needs. Pattern making, draping, hemming,fitting and Design analysis.
  This feature can and should be created on your personal form as well.

4.  A Natural Linen Cover  


The linen cover is extremely durable, completely smooth and has a slick finish to it which allows your garment to hang naturally.  Important when you want to see how the fabric will hang on a body.  The natural color allows you to see your garment with out adding visual noise to your design.
This is a nice feature, but not required and can certainly be replicated on your personal form.

5. Arms


  A firm flexible arm can be purchased to attach to your form.  
These are used primarily in the rtw industry though.  
Generally the arm is to narrow to be effective for personal forms. 
This feature can be replicated more accurately on a personal form.

 6. A pinnable surface

  
Pinning securely into the form is critical for all 5 of our stated needs.  Even when using a form for decorative purposes you will find this helpful for securing elements.
Professional forms do generally have a superior surface for this.  They are made from a paper mache base, covered with batting and then covered with linen.  This combination creates a firm secure pinning surface which plastic, duct tape, and foam cannot equal.  Later in the series we will discuss another way of achieving this on our personal forms.


Professional forms come in standard measurements and cannot be adjusted after purchase except thru the use of padding.  You certainly cannot make them smaller, but if all the length measurements are correct and you just need to thicken the waist, add a cup size to the bust, or add some more to the hip, abdomen or buttocks you can layer some cotton batting(as used in quilting).  
Fabulous fit has a body pad set which provides various foam pieces to do this with.  I have used this with varying degrees of success.


In the RTW industry after creating patterns and making design decisions using the form they make a sample garment and then call in their fit model.  A fit model is a person whose measurements are the same as the form.  These gals are not easy to find and they are required to maintain their weight and measurements strictly. The sample garment is placed on the fit model to see how the garment moves and if the ease amounts allow for comfortable wear while still maintaining the design objective.

No matter how close your form replicates your body you cannot avoid this final fitting to check for ease of movement. 

I hope I have covered everything, but please feel free to ask questions or provide additional comments as you see fit.

Thursday, February 7, 2013

How to Turn Winter Doldrums to Sewing Enjoyment

Last week I added a new badge to my blog ..Focus on  Enjoyment Re-sew-lution and trust me February in Wisconsin requires creative ways to endure the snow, below 0 temps and 6 hrs of daylight.  

Don't I look like I need therapy of some sort...

So I thought I would share with you one of my tips to bring some cheer into my studio during these bleak months.

Fresh flowers and a proper cup of jasmine tea.  Quite fragrant and lovely


Add a favorite classic movie and you have Sewing enjoyment. 
The scent of fresh flowers chases winter away and the color has me rethinking some upcoming projects.


The project for this particular day is marking seam allowance for a new custom dress form cover.

What have you done this week to enjoy your sewing?


Sunday, February 3, 2013

Dress Form Evaluation Part 1 - Purpose & Cost

All my girls...and boys are lined up for inspection. 
and it is now time to begin our series on 
Dress Form Evaluation.  
What are they for?
What do they cost?
Is it worth the expense? 
These questions and others(if you have them) will be answered in this series.

U.Y. $215.  Superior $350.   Fab. Fit  $750-2200.   U.Y $375.00   Wolf $375.00 
These are my working dress forms.

There is also this...

flea market find $10-? + time

Which is used for Display purposes in the fitting room.

And although I do not own one, there is also this...

My Double Deluxe  $ 107.-160.
Whoops I almost forgot this very popular option which I have made for clients as well.
The Duct tape form

From Threads Magazine  $125-250 + time


  What do I use my Dress Forms for:


          1. Design analysis - Being able to stand back and look at a garment is critical to evaluating its effectiveness.  You are able to see the whole garment as others view it.  This is not possible while looking in the mirror, because a mirror flattens the image.  Additionally when we view ourselves our critic goes on high alert, and we have difficulty seeing beyond our perceived body flaws.  The dress form removes these issues and allows you to evaluate the proportions and adjust them.  I often leave a garment on my form for days on end while making design decisions.  This allows me to evaluate it with a fresh eye every time I enter the studio.

          2. Hemming - A very basic use, but a proper hem one that is intentionally parallel to the floor or not creates a professional look to any garment.  Uneven hems highlight large hips, large or flat buttocks, dipping waistlines, and bulging abdomens.  Not to mention they just give a sloppy appearance.
       
          3. Draping / pattern making - The quickest way to design and create proper fitting patterns for yourself is done using a dress form that has been modified to fit you. This has been well documented on Project Runway where the designers drape their patterns, sometimes directly in their chosen fabrics.

          4. Fitting - Fitting garments on yourself can be frustrating to impossible.  A dress Form that has been modified to fit you, resolves this as well.  By placing your garment on the form you can pin out unnecessary ease, release seams where strain exists, lengthen, shorten, adjust button placement, collar shape, neckline depths, etc.   It will not replace a test fit on you completely, as it you will still need to feel the fit, while sitting and moving, but it will get you closer to the goal with less clothing changes and more accuracy.

          5. Display - What can I say about this that you do not already know.  If you have vintage garments, family garments, newly accomplished projects it is fun and rewarding to show them off.

As this series progress we will evaluate each type of form to see how well they provide these uses.  You may not need your form to do it all, maybe hemming, fitting and display are all that you require.  Maybe you want to start an Indie pattern company, or start an alterations, dressmaking business. Maybe you just want to enjoy sewing for yourself.  Truly the correct dress form will help you do all of this better:)


Friday, February 1, 2013

Sewing because you like it.


You may have noticed a new badge on my blog

Courtesy of Dixie DIY via so i sewed this

it reminded me of this quote which I frequently share with students.

"Pleasure in the job puts perfection in the work" - Aristotle

Just a reminder, to enjoy the process, to think quality and not quantity. 
 Reflect on your goals and achievements.

Sip a drink, smell the roses, 
Citrus and Orange Milk Glass

soak in the glorious colors and textures of your current project.


flikr


While trying to gain a new skill, don't overlook your progress so far.


Paco
Join a class, snack on some chocolate, remember to breath..just enjoy the process

A friendly reminder for myself and my friends
Related Posts Plugin for WordPress, Blogger...