Sewing Cafe

Patterns, Tutorials and Works in Progress from the Sewing Studio of Lynne Williams

Saturday, August 20, 2011

Pajama Pantaloons Sew Along - French Seams etc.

Today we start assembling our Pajama pants. You should have your pieces cut out and your ruffles ruffled.


The first step is to mark the wrong side of my fabric so I don't get confused and end up with two right legs or something equally rediculous, two left legs. I identify the wrong side by placing small bits of masking tape to the wrong side of each pant leg.

Now that our pieces are labeled we will sew our inseam using a French Seam.  Here we have a nice illustration of how and what a french seam looks like.  Its somewhat clearer I hope then the pictures.

French seams are my favorite type of seam because they look so neat and clean.  Any seam you sew must be sewn at least twice anyway...1) the seam, and 2) the seam finish.  With a French seam you are encasing the raw edge with in the seam, so you see no raw edge.  It works well for light weight fabrics and I often use it as a substitute for flat fell seams.

trimming your seam allowance back to 1/8"
Step 1 - Sewing the inseam
To begin take one back pant leg and one front pant leg and with wrong sides together sew the inseam of your pant leg at 3/8". After sewing trim your seam allowance back to 1/8". 
 Press to set the stitch into the fabric.  Open and press the seam allowance to one side. 
Now fold the seam along your stitch line placing the right sides of your fabric together and stitch again this time at 1/4".
Repeat this for the other pant leg.

Step 2 - Marking Ruffle placement.

 Fold your hem up to the wrong side 1/2" and press. Fold again along your hem line (mine was 4") to the wrong side and press again.


Lay your pant leg on a table with right side facing you and the  pressed hem layed out flat so that you can see the hem fold you just pressed. 
 Draw a line parallel to your hem line 1" up from the crease. 
Draw 2 more lines 1-1/4" each above the first line. 
 You can use a pencil or dissapearing ink marker, whichever shows up the best on your fabric. 
 This marks the placements lines for our ruffles to go on.

Step 3 - Sewing Side Seam

side seam with wrong sides together and ruffle placement marked ready for its french seam.

Using your french seam technique again sew your side seams on both pant legs.  You now have two pant legs ready to be hemmed and ruffled.

Step 4 - Hemming

Hemming from inside the pant leg.


Pin you hem in place. 
Turn your pant legs right side out. 
Edge stitch your hem, by sewing from inside the pant leg as pictured. 
To edge stitch you will stitch right next to your top fold all around your hem.  You do not need to back stich because as you come around to complete the hem you can sew a few stitches over from where you started.

Step 5 - Sew your ruffles into loops.

Take one of your 6 ruffled strips and french seam the short ends together to for a loop. 
You may need to remove a tuck or two on each end to accomplish this neatly.
Repeat for all ruffled strips.

Step 6 - Sew your ruffles to your pant legs


If you have a free arm  sewing the ruffles on is a good opportunity to use it. 
If you do not have a free arm, sew from inside the pant leg, as you did the hem.
Pin your ruffle loop down the center to the 1st line (nearest your hem) and stitch down the center. 
If your loop is a longer the your pant leg just add a tuck into your ruffle.  If your loop is short take a tuck out by removing some stitches.
Repeat with 2 more ruffles moving up the pant leg each time. 
Once all three ruffles are on one leg, repeat the process for the other.

Step 7 - Sew your crotch seam.

Now that you have two ruffled pant legs. Take one pant leg and turn it inside out, so that you have one leg right side out, and one inside out.


Insert the right side out pant leg into the inside out pant leg and line up your inseams.
  Pin around your crotch and stitch. 
Next finish your seam by trimming back to 1/4" and zig zagging or serging or using the overlock stitch on your machine if it has one.  You can check your manual to see.

back crotch curve is deep                         front crotch curve is shallow

You should now have pajama pants, not just pajama pant legs.  Congratulations!
Next week we  will finish them by smocking our waistband.


Previous pajama pantaloon posts:
The Pantaloon Plan
Lets Begin
Cutting Strips for Ruffles
Sewing Ruffles


Jeans That Fit You...Oh happy thought:)

The Nicolet Continuing Education Catalogs have arrived.  The Fall schedule runs thru Dec.  You can also print or save the pdf catalog if yours has not arrived yet.
 
Jeans That Fit: 
This class has 4 Saturday sessions in September. We will using the Jalie pant pattern which has received rave reviews. There is a class material fee of $45.00 dollars which will include the pattern, denim, zipper, jean button and studs essential for professionally finished jeans. You need to understand pattern instructions, sew basic seams and have your own machine.    If you struggle with finding jeans that fit, we will end that struggle for you. You get to be the "Decider"! Low rise? Medium rise? High rise? Boot cut? Straight cut? Flares? You decide......excited at the possibility of having jeans that fit you in the waist and the hip? Please join me then in making your perfectly comfortable jeans

Class starts on Sept 3rd is held for 4 Saturdays thru Sept 24th. 
Time: 10:00 - 3:00  Class #20700
Cost: $65.80  Seniors pay $43.08 with a $45.00 kit fee.
Which will provide you with a custom made pair of jeans and a pattern for future pairs!
Location: Nicolet Campus BC107 ( building 7 on the map)

Mail in registration begins Aug. 11th, Phone in/walk in Registration begins Aug 19th
Stretch Jeans

The Stretch jeans have a low rise, or regular rise option and although the pattern calls for a modest 2 way stretch, we can make the necessary pattern alterations in class to provide for a non stretch denim if your prefer.  The pattern also provides sizing for little girls as well as accommodating a hip measurement of 36" to 53"
This is the style I am planning on using for my sample jeans and I just purchased this yardage from Sawyer Brook  denim collection to make them from.  Cannot wait for it to arrive:) My 2nd pair will be in corduroy...for sure.

The twill weave featuring black and white results in a deliciously subtle charcoal color that works with so much. Great weight for jeans or jackets. Cotton/spandex. 62 in. (C)  
 Jalie also has this more traditional style pattern to choose from it also includes children's as well as women's with a hip measurement ranging from 36" up to 67" and is made for use with a non stretch denim, but remember we get to be the deciders so you could use a modest stretch denim with this pattern as well.
Traditional  non- stretch jeans

The kit for the class if you choose to purchase it, will include a traditional navy denim with the necessary supplies to create your jeans.  Alternatively you can provide your own denim and zipper with a reduced kit fee of $25.00. 

I would appreciate being notified as soon as possible when you have signed up for class so that I know what kind of supplies to purchase and in what quantity.

Let me know if you have any questions as well.

Hope to see you all there.

You might also be interested in:

Tuesday, August 16, 2011

Jeans that fit......me:)

The Jeans that fit class at Nicolet begins on Sept 3rd and so I thought as a teaser I would show you how my sample jeans turned out. 

I am really quite pleased. 

What I like: 
  1. The color, this Charcoal is a nice change of pace and will help me move into fall. The fabric is a lighter in weight than standard jeans, which will be dynamite for summer, but I am thinking a bit thin for winter...you all know how cold I always am. 
  2. The Fit...this should really be #1 right?  They look great and are comfortable. 
  3. The rise is just where I wanted it
  4. The top stitching color and width pleases me
  5. Construction - they were simple to put together, but I am glad I have a few machines to set up so that I did not have to change my thread and needle constantly....having 2 machines made it more convenient.
  6. My husband says they look great
  7. My husband says they look great - lol
After a day of wearing, they look just like my favorite BKE jeans but shorter....Hmm, not happy with how short they are, great with flats though. 
I am throwing in some additional construction pictures....why not...right?


The back pocket

The Front pockets and fly.  I added the coin pocket.

This is my waistband which Jalie has you place on the bias.  As you can see I pressed a gentle curve into it prior to sewing to keep it from gaping on along the back.

I used a piece of selvage tape along the top of my waistband to keep it from stretching out on me as I top stitched.  I made the length of the tape the same as my low rise waist circumference to insure it would not become to large or to small.  You know how that bias likes to stretch on you.
Had to add a final shot of the rivets.  I chose this tarnished silver, but the tarnished brass was another tempting option.

These jeans are part of my wardrobe plan for fall of 2011.  To see more check out the links below.
Fall wardrobe plan

Sunday, August 14, 2011

Fall Wardrobe 2011

I am loath to admit that summer is coming to a close...glorious warm and sun drenched summer...But my despair at summer's passing is always brightened by Fall Fashion.  Fall is my favorite fashion season because I love sportswear and separates, textures and layering and of course that is what fall is all about.  Some brilliant women on Pattern Review started a thread for a fall sew along.....I do love a sew along....and I do love fall fashion....and I do need some new items in my wardrobe...or perhaps what I need is to sew up some of the lovely fabric I have here in the studio.

So what do I have in my studio?


Nothing says fall quite like a pumpkin plaid right?

Now for the plan....


Jalie jeans in the denim ...which are already underway...Hooray! 


A vintage Vogue wool jacket, which will really dress those jeans up, not to mention brighten up some other items in my wardrobe.  This project has been in the stash for ....4 yrs now, so I think its time don't you? 


This wool came from Sawyer Brook I believe several years back as well and I want to make this pencil skirt with the interesting detail at the hem.  I will make this from my skirt block and use it as a sample skirt for my Sewing Lab 102 class coming up in September....Better get a move on then:)


The Pumpkin felted wool I have just enough to make a vest from.  I am not sure it will be this Folkwear pattern..I am mulling over something far more simple, but we shall see.

So what do you think of my plan?
Have you started sewing for fall or are you onto winter? Sheesh

Want to see the finished items?  Just click on the links below.
Jeans

Friday, August 12, 2011

Pajama Pantaloon - Sewing Ruffles


It's time to make ruffles:)

Gather your supplies:

Iron and board
Spray starch - optional but helpful
Sewing machine- cleaned and ready for work
Thread- All purpose to match your fabric
Ruffler foot - optional
Narrow hem foot - optional
Scissors - I prefer small embroidery type
Fabric strips- see tutorial from 8/10/11

Press your strips using a liberal amount of spray starch.  I really like the Best Press starch because it never clogs or spots your fabrics.  I really like their lavender scented, but unfortunately my allergies will no longer allow me to enjoy scented anything...sigh.  So it's the unscented version for me.  I pick mine up at our local quilting store, but I noticed that she has some other very intriguing products on her site.....
Ruffler                                    Narrow hemmer                             Adapter


To begin sewing we will hem our strips using 1 of 2 methods. 
Method 1 will be with the narrow hem foot. 
Method 2 will be without.

Method 1:
The Narrow hem foot in the center creates the tiniest of rolled hems, simply lovely. 
The drawbacks to this foot though are that it cannot hem the first 1" or so of your project.
 Nor can it sew over seams as the bulk will not feed through properly.
It also does not perform well on bias edges.

It is perfect though for our strips, and  say dust ruffles. Any long straight lengths.
My narrow hemmer is an old foot from Singer that came with my Singer 301.  I can use it on my Bernina with the help of the adapter.  Old sewing feet like ,my narrow hemmer, screwed on, but the newer machines use various kinds of quick release features, which are handier than having to pull out a screwdriver every time you change your foot.  Using the adapter allows me to screw my singer foot on to the bottom, and then attach it to my Bernina. For information on where to purchase the various feet mentioned here please check this post

Thread your machine and attach you narrow hem foot.  To see how to use it, watch the video:

Now cut yourself an extra strip of fabric at least 12" long and practice using your hemmer. 
Comfortable?
 Hem all your strips along both long sides.


Now to Ruffle.
Place tape 1" to the left of your needle to use as a guide to stitch down the center of your strips.
Attach your ruffler foot by printing up these instructions from Singer.
Set your pleat spacing to 6 stitches between pleats and your stitch length at 2.5
Watch the video:

Grab your sample strip again and practice pleating up your fabric strips.
Practice?
Pleat up your strips....its fun....so enjoy:)
 
 
Method 2:
Press your strips as instructed at the beginning of the post.  Now you will prepare your strips for a rolled hem. 
 
 Fold the long edge of your strips to the wrong side a fat 1/8".  I would recommend preparing one side of each strip this way, then after sewing return to do the other side.
 

I use my #37 foot/quilters foot for sewing rolled hems and I move my needle position 1 click to the left on my Bernina. 
 You will need to do some practicing and experimenting to see which foot and what settings are easiest for you. 
Roll the pressed fold of your fabric towards the center the same fat 1/8".  Position your fabric so that the fold on the left sits just within the inside edge of your presser foot and stitch, continuing to roll the edge over as you sew.

Once your strips are hemmed on both sides.  Lengthen the stitch on your machine to 4 and starting 1/2" from the short end stitch down the center of each strip, ending 1/2" from the end.  Be sure you leave a thread tail at the beginning and end of each strip.

Your strips are now ready to be gathered into ruffles, but lets wait until you have sewn your pants up.
Method 1 will have ruffled strips like these.  Method 2 will be flat and not gathered yet.

Next Friday we will dig into sewing the pantaloons together.


Let me know how you did, and please ask for help if need be.


Wednesday, August 10, 2011

Pajama Pantaloons - Cutting Strips for Ruffles

Today I am doing a mini tutorial on how to cut the fabric strips for your ruffles. 
The quilting industry has developed some handy tools  for cutting strips, which work equally well for garment sewing.
 For cutting narrow strips of fabric quilters use the technique you will learn today.  If you are already familiar with this, you can come back on Friday to learn how to hem and gather/tuck your strips.


Gather your supplies for learning Rotary cutting:

1. 1/2 yard of fabric to match pantaloons or a contrast would be cute as well


We need 6 strips of fabric 2" wide by the WOF
(this means width of fabric from selvage to selvage). 


Fold your fabric so the selvage's lay on top of each other and the fabric lays smooth with no twists in it. 


Now fold, the fold on top of the selvage edges.


 Lay your fabric on your cutting mat and with the folds lining up with the horizontal lines on the cutting matt.  Lay your ruler so that it follows a vertical line and cut your fabric by running the rotary cutter along the edge of the ruler.  This takes some practice so I suggest you try it on some scrap fabric first.  Just play with the rotary cutter to get a feel of how it works, how much pressure it takes to cut through 4 thickness (probably less then you think).  Also practice cutting along the ruler so being careful that your ruler does not slip.

Have you practiced?


Then go ahead and cut that first rough edge off.  Make sure you are cutting through all 4 layers.  Sometimes that leading edge is really wonky and you may need to go quite a bit deeper then the 1/2" I need for my first cut. 


At this point I flip my fabric around so the edge I just cut is to my left, instead of my right.  Lay your C-thru ruler along your new edge so that the 2" mark is onto of your cut edge.  You will now cut a 2" wide strip by using your rotary cutter to the right edge of the ruler.

Repeat this step until you have 6 - 2" wide strips.

Now if you don't want to invest in cutting mats and rotary cutters, etc.  You can do it the way my mama taught me:) 

 Mark  6 lines on your fabric, 2" apart with a pencil and then cut along the pencil lines.

Oh boy your strips are ready to become ruffles now =D

Sunday, August 7, 2011

Comment Trouble:(

Is it just me? 

For awhile now I have been having difficulty posting my comments on other blogs as well as my own.
Frustrating!

So I have continued to try and sometimes it would work but most of the time not.  I would get stuck in this loop where it would keep asking me to sign in, when I already had.  Sometimes it would allow me to post anonymously, but not always.

Frustrating!!

Today I finally spent some time investigating this issue and discovered that it is a cookie problem....
really?  I also discovered that this is a common problem and that it can reduce the comments on your blog by 50%! Additionally I recently had someone question me on how not to post anonymously and I am now wondering if this "cookie" problem wasn't the issue.

So, if you have had this problem.  Go to "tools" on your Internet provider,
then Internet Options >Privacy > and change your setting to Allow all Cookies.

I am now once again able to comment on the blogs I visit as well as our blog, which is rather important because after all we are having a Pajama Party Sew Along.

The article I read on the subject also mentioned that it has to do with the embedded comment form.  When the comment form is a pop up window problem solved. 

My next investigation will be to see how to change my comment form to the pop up window style:) 


Thanks for reading and I hope this helps someone besides myself


Friday, August 5, 2011

Pajama Party - Lets Begin Shall We

Hope you all are as excited as I am to have some stylish pantaloons. 
Is anybody sewing something other then the pantaloons? 
Please let me know so I can address your questions appropriately:)


Lets begin by pre-washing our fabric.  It can be in the wash while we prepare our pattern for cutting, which is my kind of multi-tasking.

You want to pre-wash your fabrics for a few different reasons.
  1. The key issue is shrinkage, you don't want your garment to become to small after sewing because you failed to pre-wash it.  Denims, flannels and homespun should be washed and dried at least 2x.
  2. Grain perfection is another key reason to pre-wash.  The grain of the fabric is distorted from being wrapped onto a bolt or roll, washing helps return the grain so that the cross grain is at a right angle to the lengthwise grain.  Why is this important?  Your garment cannot hang straight if the garment is not cut on the straight of the grain.  
Pre-wash and dry your fabric at the temperature suggested for the fabric type and the conditions you are most likely to use during wear.  For cottons this generally means hot water, and a hot dryer, for silks and rayon jerseys cold water, gentle cycle and line dry or air tumble.  

Now that your fabric is having its grain perfected, lets start our pattern work

I happened to have The Jammie pattern from Favorite Things in my stash from a class I taught years back, so this is what I am using to create my pantaloons, but any simple drawstring pant style will work.  Of course if you have a self drafted pant block(luxury) you can use that as well.

Gather supplies and information:

To prepare you pattern for cutting you will need:
The pattern
Tape measure
String or elastic to tie around waist and upper thigh
Personal measurement chart or scrap paper
Pencil and Pen
Rulers - I prefer C-thru quilters rulers, a 1x12 and 3x18 or larger.
Paper scissors
Iron and Ironing board

Taking Measurements - This is the information part.  Now if you have a current personal measurement chart you can just get your information from there.  If you don't I highly recommend you start one so that you don't need to measure yourself every time you start a project.  It does need to be updated yearly though.   Here is a chart to print


The Measurements:
  1.   Hip/ Seat circumference at the fullest part.  For some this will be at the abdomen and for others across the buttocks. 
  2. Pant Rise - this is the distance between your crotch and your desired waistline.  Tie a string around your desired waistline ( where you want the top of your pantaloons to sit).  Tie a string around your upper thigh, just below your crotch.  Now measure the distance between the two along your side. 
  3. Hem length - Measure from your desired waist line to your desired hem line, for Capri's mid calf or below, for pants measure to the floor. 

 Find your Pant front and Back pattern pieces and remove them from the tissue by cutting around them.  There is no need to cut on your size line at this time, just free them from the tissue. 

Press with a dry iron...yes press the tissue, it will not burn but steam might cause shrinking so be careful to change the setting on your iron to dry and press out all the folds and wrinkles.

Choose your correct pattern size by comparing your full hip/seat circumference measurement with the body measurements on the pattern envelope.  My full hip measures 38" which on the Jammie's patterns puts me at a Medium and on most commercial patterns size 12.  Now don't freak because this number is so different then the clothing sizes you purchase. 
Pattern sizing does not correspond to retail clothing, trust the pattern size....really:)

Now if you like the design on your pant pattern the way it is shown on the envelope you might be ready to start cutting your fabric.  Meaning the waist line is sitting where you want it to, and you do not want to raise or lower it.  You will need to check the hem length though by measuring along the side seam of the pattern from waist to hem and lengthening or shortening as required.  The pattern usually indicate a place along the leg where you can do this.  To lengthen you cut along the line and spread the pattern apart the desired length taping a piece of paper in between to fill the gap. To shorten you can fold the tissue up the needed amount. 

For my Pantaloons though I am lowering the waistline, and shortening to Capri length so lets begin making those pattern changes.

Begin by extending your grain line through the entire length of the pattern pieces.
Mark your crotch line by drawing a line perpendicular to your grain line and level with the bottom of the crotch line of your pattern. Some patterns already have this indicated for you.

Measure up from your crotch line to your new waistline at the side seam and mark.
Measure down from the original waist to that mark.  Mine was about 3"
Create your new pant waistline by marking that distance across the entire waist of the pattern piece.

Create your hemline/fold .  Starting at your new waistline measure down the side seam to your desired Capri, or pant length, mark and create a line at that mark and perpendicular to your grain line.

To create your hem allowance.  Measure down from your hemline 4.5" if your making Pantaloons, or desired hem width, say 2" for a standard hem.  The deeper hem adds support for the ruffles we will be adding later. 
You can now cut across your hem cut line.

Before cutting out the rest of your pant leg fold your pattern along the hem line/fold, and pin in place.  Now you can cut the rest of your pattern out.  Once the pattern is cut remove the pins and press the pattern flat once again.  Folding the hem before cutting insures that your hem is the correct width and will not cause puckering when sewing from being to small.

Repeat these steps for both front and back pant legs.  Although this took me several hours to post about it will probably take you around an hour, or under.

You can now cut out your pants following the directions on your pattern.  In addition to the pants you will need to cut  6 strips of fabric 2" wide by the 42" - 60"width of your fabric to create the ruffles with.

Next week we will make our ruffles:)

Please let me know if you have any questions or have progress pictures you would like to share.

Wednesday, August 3, 2011

Caped Crime Fighter

 Here it is....can you believe it?  What a journey!  For all of my friends and family who have heard the tales of woe, purchased drinks for me during mad rants, hugged me through actual tears...Thank you.  Thank you for your kind support and continued friendship.

Now that the lessons have been learned and the hurdles leaped I am looking forward to producing more patterns.  More patterns for costumes, more patterns for fashion and accessories, more patterns that teach the art of sewing.   I hope you like them and I am looking forward to hearing your feedback.


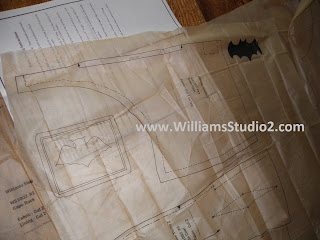
These tissues are familiar to us sewers, but this information and these images have never been produced as patterns before for adult fans.  It is all here...Chuck made sure of that.... how many points on the cape? What size is that belt buckle...exactly? ....How do you make a cowl cover? How far apart are the fins on the gloves? How tall is the point on the front of the boot and how low is it in the back?  What shade of blue is that anyway?  How do I build a Utility belt? 


 Like this.....you purchase the patterns at WilliamsStudio2.com and you gather your supplies ( all detailed for you) and you follow the directions.  You can even come back here for tutorials like this one on making the fins and how to insert them correctly into your gloves.


This is Lynne in her role as a happy camper:)

 Now that both patterns are in the house shipping will begin tomorrow.  Currently the web-site still shows the patterns as being available as pre-orders, but rest assured they are in stock and shipping quickly.  Our wonderful IT guy, Scott Sebring will update the site as soon as he returns from visiting family.

Tuesday, August 2, 2011

Pajama Party Pantaloon

 Ta Da! my completed Pajama Party Pantaloons.
Chuck says they remind him of Sandra Dee....I will accept that:)
I say I am ready for a pillow fight and a game of Twister

Our Pajama Party sew along will have its first official installment this Friday, so ladies I hope you are gathering your supplies.  Speaking of supplies...if you want to make a pair of pantaloons you might want to pick up some additional items above and beyond, your pattern, fabric and thread.

Ruffler                     narrow hemmer                adapter
These feet above are not required to complete the pantaloons, but if you have them on hand or have thought about purchasing them, now might be a good time. I will be showing you how to use them...I have even made some video tutorials for us.

The Ruffler and the Narrow hemmer are old singer feet which you can pick up on ebay, or at yard sales and no you do not need a singer sewing machine to use them.


The adapter foot was purchased through my local Bernina dealer for use on my Bernina.  This adapter foot is what allows you to use other manufacturers feet.  What you need to know before purchasing an adapter is:  Are your singer feet low shank or high shank?  Bernina makes both adapters but a high shank adapter will not work with a low shank foot.  I could not find the adapters on their website but the numbers are #75 standard  or #77 short. 

Bernina does sell rufflers and narrow hem feet as well, but they do tend to be more expensive then the above alternative.

I also used elastic thread to create the smocking at the top of the pantaloons.  Gutterman also makes an elastic thread which will work as well.

If you want ruffles on your hemline, certainly not required but that's fashion for you.  I would pick up an additional 1/2 yard of fabric.

So to recap:
  1.   Pajama pattern
  2.   Fabric and thread to match, plus 1/2 yard for ruffles
  3.   Ruffler foot, narrow hem foot and adapter - optional
  4.   Elastic thread for smocking
  5.   1" wide Ribbon to tie at waist
  6.  Universal or sharp machine needles size 10 or 12
  7.  A clean sewing machine
  8.  Sewing notions - pins, scissors or rotary cutter, iron and board, seam gauge or 1" c-thru ruler, 3x18 c-thru ruler, pencil or fabric marking pen, hand needle, contrast thread, tape measure

Here is a list of the follow up posts.  Click on the link to take you to each tutorial.
Lets Begin
Cutting Strips for ruffles
Sewing Ruffles
French seams etc.


Related Posts Plugin for WordPress, Blogger...